Introduction
OCR software converts images of typed or printed text into digital text files that can then be manipulated and used for various forms of text mining. The history of OCR goes back to the early decades of the twentieth century when “reading machines” transcribed text into telegraph code, for example. Later, in the 1970s, a form of OCR that enabled computers to read texts aloud was developed to assist blind people with reading. OCR software as we know it today has been in development since roughly the mid-1980s.
This overview will not cover commercially available OCR to any great extent, but will instead survey the currently available open-source software and explain how to use it. There are many commercial options available and it would be difficult to do any justice to them since that is not the main goal of this guide. Additionally, we prefer open-source software solutions because proprietary software is not always easily available and we find that open source software is best for running batch OCR on the scale required for our purposes. For those interested in using commercial OCR software, ABBYY Finereader is a good place to start. But even with the commercial software, one's mileage may vary significantly depending on the language of the texts one is confronting, the condition of the books one hopes to convert, and the font in which they are printed.
My experience with OCR has been primarily limited to the work required for Prof. Lynne Tatlock’s effort to text-mine the German editions and adaptations of Jane Eyre, and many of my explanations are influenced by the needs of this project. Nonetheless, I will also look at software that works well for running OCR in English. The two most useful programs we have encountered are OCRopus (sometimes also known as the impossible-to-pronounce Ocropy) and Tesseract; they will both be described in greater detail below.
A Note About Operating Systems / Compatibility
While some of the tools discussed below are compatible across all three major operating systems (Windows, Mac OSX, and Linux), this is not always the case, and I will make a point of identifying what works where. Additionally, more or less everything that will be detailed in the following sections requires the use of a command line interface (CLI). The CLI is a way to communicate with one’s computer directly, circumventing the graphical user interface (GUI) of the operating system, a circumvention that many of us find procedurally liberating. For more information about navigating a computer via the command line, please see the Programming Historian or give the Codecademy’s tutorial a try. This guide will assume a basic knowledge of how to navigate between directories on the command line.
Because I am a Mac/Linux user, the directions for installing and running the software on the CLI will be given in the unix-based system-compatible form that covers both Mac and Linux. Windows users who would like to know more about the command line can find relevant information in the Programming Historian tutorial.
The OCR Workflow
Step Zero: Installing the Necessary Software
Before one can begin to convert text images to text files, one will need to download and install a handful of programs:
ImageMagick
The first thing one needs to ensure is that there is only one page per image file. If this is not the case, one will need to install the program ImageMagick. ImageMagick is a pretty nifty and powerful tool for manipulating image files and converting them into different formats in batches; it automates these processes and prevents a lot of unnecessary clicking. ImageMagick has compatible packages for all three major operating systems, and more information about that (as well as explanations of the various commands) can be found at the documentation website.
To install ImageMagick on Linux, open the command line terminal (simply search for the program “Terminal” to find it) and use your system's package manager. If you are using Ubuntu, type:
sudo apt-get install ImageMagick
(the terminal is space and case-sensitive). Enter the account password for the computer admin when prompted to do so, and the installation will begin to run. When ImageMagick indicates how much space it is going to use, type 'Y' to confirm, and the program will install. It could very well be that ImageMagick is already there, especially if the computer is running Linux, since it is bundled with many distributions of Linux; if so, the terminal will update the software if there is an update available.
To install packages like this on a Mac, one will first need to install either Macports or Homebrew and follow their documentation (Homebrew is discussed later in this guide).
Gimp
If one’s images are not uniform in their appearance and can therefore not be rotated, cropped, etc. in a batch process, then one might want to consider installing Gimp. Gimp is an open-source image editor that has a lot of the same capabilities as Photoshop and can be used to edit images individually. Of course, if Photoshop is already installed, then this is unnecessary. For Linux users, though, it is probably a good tool to have in the box regardless. There are versions of Gimp available for all three operating systems.
Enchant
OCR software is error-prone. For most use-cases other than the most error-tolerant forms of text-mining, it is necessary to clean up the output of an OCR routine. If interested in comparing the OCR results to a dictionary in order to assist in clean-up, one might want to install Enchant. Enchant is a spell-checking program that can run from the command line. If the computer is running a recent version of Linux, Enchant may already be installed. To check, type
sudo apt-get install enchant
into the command line.
Comparing OCR Packages
One should choose one's OCR software to suit the language and font of the texts one hopes to convert. From experience, the best results in English seem to come from using Tesseract, while the German Fraktur package in OCRopus seems to be much more successful at navigating that font. While Tesseract runs in one command and takes less time to master, it offers users fewer options for controlling the parameters of the program’s output — a disadvantage when one is attempting to convert a challenging text image. In such cases, OCRopus is a bit more flexible.
Tesseract
Tesseract is compatible with all three operating systems. To install Tesseract on Ubuntu Linux, simply enter the following into the command line:
sudo apt-get install tesseract-ocr
Mac users will first need to install a package manager called Homebrew. After that, from the command line enter
brew tesseract
from the command line and Homebrew will initiate a prompt to install.
If trying to OCR a language other than English or a particular kind of font, one may have to experiment or see if Tesseract or OCRopus has made additional language/font packages available. Many languages are accommodated in the standard installation, but those additional packages that were developed later must be installed as add-ons. Both programs allow users to create their own training data and to make their own packages for reading text files. This feature is advantageous if users need something more specific or find that the packages, as distributed, are not providing good results. Results from such customizations will certainly vary here.
The earliest versions of Tesseract were in development in the late 1980s and early 1990s. The project lay dormant for a time, but since 2006 Google has been maintaining it. More information and the documentation is available here and here.
OCRopus/Ocropy
Unlike Tesseract, OCRopus is officially available only for Linux users. In my experience, a straightforward workaround for Mac users wishing to install OCRopus is to install an Ubuntu Linux partition on the Mac (also known as dual-booting; it would also be possible to run Linux in a virtual machine). The installation is not very difficult, and the operating system is actually quite lovely if one prefers things on the simple side. Instructions may be found here. The download page has options and instructions for Windows and Mac, including booting from a USB drive.
OCRopus is not so much a single software package as it is a compilation of various scripts that work together from the command line interface. The installation is therefore slightly more involved than that for Tesseract. The following works for Linux only.
The first step is to download OCRopus from this website. Download the .zip file containing the main files needed to run the software: unzip it and copy it into the home directory.
OCRopus relies on several packages that may already be installed. Before getting too much further into the installation, confirm the presence of these packages (or install them) by typing
sudo apt-get install [name_of_package]
for each of these packages:
libpng12-dev
freetype6-dev
libhdf5-dev
If prompted, type ‘y’ to confirm the installation. These are developer packages that enable OCRopus to rely on other software behind the scenes.
The next step is to install the necessary Python packages OCRopus needs to run. Python is a type of programming language, and OCRopus is written in it. To do this, type the following into the command line:
sudo apt-get install $(cat PACKAGES)
This step could take some time. If, for some reason, this command does not appear to do anything, look at the lists of required packages in the “requirements” text documents that are included in the OCRopus .zip file and install them individually (in the order in which they are listed) just like the other packages mentioned above.
Next, one needs to download the models needed for the OCR software. Models are training data the software uses to “learn to read” different languages and fonts. The default English model can be acquired by typing the following into the terminal:
wget –nd http://www.tmbdev.net/en-default-pyrnn.gz
Once the package downloads, it needs to be moved to the proper directory. Do this with the following:
sudo mv en-default.pyrnn.gz models/
This moves the file to the models folder generated from the .zip file already downloaded.
Next, to install OCRopus, enter:
sudo python setup.py install
To test the installation and make sure that everything is working, one can run a set of test OCR files that are included in the .zip folder by typing the following:
./run-test
One can install other packages for other languages and fonts, though there are not as many separate ones available for the latest version of OCRopus just yet. The Fraktur package (for many pre-WWII German texts) works a bit differently from the default English one. It is stored at a different web address and must then be moved to a different folder than the English package.
First:
wget –nd http://www.tmbdev.net/ocropy/fraktur.pyrnn.gz
Then, to move it:
sudo mv fraktur.pyrnn.gz /usr/local/share/ocropus/
Once all of the necessary packages are downloaded, relocated, and installed, OCRopus should be ready to go.
PyRenamer
One final program that could come in handy: Working with lots of scanned images means lots of files with lots of names that probably have lots of numbers in them. Sometimes numbers can get mixed up in the shuffle, causing the OCR to run in an incorrect page order. There may also be times when simplifying file names would be helpful. To that end, I found PyRenamer to be a very handy tool, at least for those running Ubuntu Linux. It provides a user interface that allows one to select batches of files and rename them all at once, inserting a number pattern, deleting, or inserting letters or words either within the filename or at the beginning or end. PyRenamer is available to download through Ubuntu’s Software Center. PyRenamer is not available for Mac or Windows, but there are alternatives. Mac OSX actually has some built-in capacity to do this in Finder, though the options are not as robust as those in PyRenamer. For those running Windows, Bulk Rename Utility can do much the same thing.
Step One: Scanning
Those contemplating an OCR project for the first time sometimes forget what is obvious to even moderately experienced OCR users: Successful OCR requires uniform, rectilinear, high-quality scans. Securing such scans will save many headaches at future stages of the workflow. If running OCR on large batches of files (for example, multiple multi-volume adaptations of Jane Eyre in German), it is desirable to automate the workflow as much as possible, and having good scans that do not require a lot of curating can go a long way toward making that happen. This is not to say that a project is doomed if the only images available do not meet the criteria listed above; it simply means there will be a little more work to do in step two.
Much of the scanning depends, of course, on what kinds of books need to be scanned and what resources are available for accomplishing this task. Most books will probably fit easily on most basic face-down scanners. For dealing with oversized folios that will not fit on the average scanner, one would be better served by overhead scanners or other special scanning setups (sometimes available in libraries); these types of scanners either allow the book to lie face-up or use glass panes to press the pages flat to prevent page distortions. Flattening is important for getting good scans, but can be difficult if the books have either a very tight binding or are older and therefore more fragile. This problem is particularly pertinent when dealing with rare materials and does require negotiating the the relation between the needs of digital preservation and those of physical preservation. One of the many reasons face-up scanning solutions are often preferable to traditional scanners is the fact that this form of scanning is usually less damaging to the book in the long run.
For regular-sized books, scanning in two-page spreads is probably the most efficient. One should, however, make sure to eliminate any excess space on the scanning surface in the scans by using the preview function available with the scanning software and highlighting only the book pages. This step makes separating the pages in a future step much easier (and also means the software will have the closest “zoom” possible on the page).
For basic fonts, 300 dpi (dots per inch) is probably an adequate resolution. For the books in Fraktur, an older German font, we often scan at 600 dpi. I recommend scanning the images as tiff files, designated by .tif, if at all possible. (PNG files also seem to do well.) Tiff is a non-compressed file type that does not lose data over time. This does mean that the files can be a bit large, however. One may have success with .jpg files as well, though results can vary based on the quality of the original image. (And while it may not matter as long as the images receive no additional editing, jpegs are a “lossy” format, which means they can be stored with smaller file sizes by simplifying some visually less-essential pixel-level information.) We usually scanned in color because we were also scanning the covers and images included in the texts (not for OCR, but for documentation and preservation purposes). The OCR software will convert the text pages to black and white if they are not already, and this process did not appear to affect the quality of the output.
A note about file naming: some scanning software allows one to start a numbering system and automate the file naming. This usually works quite well. I recommend formatting the numbers such that there are as many digits in the filename as there are digits in the total number of pages. In other words, if the book has 300 pages, use 001 for the first scan because there are three digits in 300. If the book has 1,000 pages, use 0001. The reason for this is how computers order number systems. If one starts with digit 1, the book pages will end up ordered incorrectly in the file folder on the computer and it will look something like this: 1, 10, 11, 12…100, before going to 2, 20, 21…200. The OCR software will then process the pages completely out of order. One can, of course, use the above-mentioned PyRenamer or something similar after the fact to clean them up, but labeling them with placeholder zeroes will save a step.
Books from the hand-press era present particular challenges for digitization and OCR. Sometimes the ink is messy or poorly done. Non-standardized spelling also makes checking one’s work quite difficult. I do not have the space to delve into these problems at length here, but there have been some studies on these kinds of problems for those who are interested in learning more. The early modern English eMOP project offers information about the challenges of using OCR software on early modern texts and efforts to improve OCR output. The developers of OCRopus have worked particularly on Fraktur and non-Roman scripts. Applying modern machine learning techniques to OCR is an area of active research. For a sample of a technical paper in this area, see this website.
Step Two: Prepping Images for OCR
Scans that are skewed or otherwise imperfect may require some alterations before they can be read by the OCR software. Below are a few tips for making some basic alterations to the files by means of a batch process.
Important Note: It is good practice to make a copy of the original images, and work only with the copies, leaving the originals intact in case something goes wrong. Nobody wants to scan the same book twice. That is why the following commands are designed to make copies of the original files with the same file names that are then directed to go into a new folder. Before each change to the images, then, one should make a new folder for the files that will be created. One can of course do this from a graphical file manager, but one can also do it from the CLI with the command mkdir [name_of_folder]. If doing it from the CLI, just make sure to navigate to the proper directory where the folder should be added.
The first thing one might need to do with the files is rotate them, depending on the scanner orientation. For this, we will be calling on ImageMagick to do the heavy lifting. (Note that ImageMagick is used here through the “convert” tool, which is one of several ImageMagick commands.) If all files need to be rotated 90 degrees to the left, for example, one would type the following command into the Terminal:
for i in *.tif; do echo $i; convert $i -rotate -90 [insert_output_folder_name_here]/$i; done
The first segment up to the first semicolon tells the program to do whatever follows to all of the .tif files in the folder. The echo command displays a counter on the screen that shows on which file the program is currently working. (Otherwise, the CLI gives no visible sign that it is doing something. If this feels unnecessary, just delete everything between — but not including — do and convert.) The last portion tells the program to rotate everything to the left, or -90 degrees, using ImageMagick’s “convert” command. If one needed to rotate the images to the right, one would type ‘90’ instead of ‘-90’, and rotating 180 degrees would just be ‘180’.
If the files were scanned as two-page spreads, the next step is to split the files into individual book pages. Again, we need to use ImageMagick’s convert command. The command will look something like this.
for i in *.tif; do echo $i; convert $i -crop 2x1+0+0@ +repage +adjoin [insert_output_folder_name_here]/output$i; done
Here is what each element of this sequence does. The ‘convert’ command tells the software to copy and make new files as opposed to overwriting the originals. If, for some reason, one wanted to alter the original files without making copies, one could use “mogrify” instead of “convert” with the same parameters. But since an incorrectly placed number or symbol could lead to the pages being cropped in ways one is not anticipating, this is NOT recommended.
After the “-crop” option, 2x1 specifies the dimensions for the crop (meaning the image will be split in two vertically down the middle and have no split horizontally). One can adjust the center to the left or right by changing the first zero value. The @ symbol tells the program to get as close to the center of the image as possible. Centering can be troublesome when book pages are not perfectly centered or were slightly stuck together and the half-images of the text blocks are crooked. In such cases, it can require some experimenting to get a good split without cutting off the text, and may require some manual editing of the files either via ImageMagick or Gimp. Gimp in particular offers an easy way to adjust for problems such as distortion caused by pages not being completely flat when digitized, though this is perhaps only a major concern if the lines are not straight. The OCR software can do some de-skewing on its own if all lines are off by only a degree or two.
Of course, one may have other needs when working with the images. The documentation for ImageMagick is a great resource for looking into what else it can do.
Once one has the images properly oriented and saved as individual pages, it is time to run some OCR in Step Three, below.
If Working with PDFs…
It could be the case that there is no physical copy of the text available and one may be reliant upon a preservation site or database where the only format available is a PDF. PDFs are quite challenging because there can be so many variables in play (quality of original scan, quality of PDF, how the pages were scanned, etc.). They are perhaps less troublesome if the language is English and the font is a traditional modern font, but even PDFs with those attributes can be tricky. In short, I do not recommend working from them, but when this is the only choice, there are a few things one can do to insure better quality OCR output.
The main objective is to split the PDF into individual page files. This challenge is more difficult if the PDFs contain two-page spreads as opposed to individual pages. The main goal one needs to achieve is to split the pages while retaining enough image quality that it can be read by the OCR software.
*Note: users of the full version of Adobe Acrobat MAY be able to split the PDFs into individual tiff files in Acrobat and use Adobe’s OCR software. It largely depends on the PDF. While I had access to a full version of Acrobat, I was not able to use the OCR software with the PDF I had, and this solution also does not help users who do not have access to such software. Thus, the emphasis here on open-source solutions.
Thankfully, ImageMagick can split apart PDFs with the installation of an additional software package called Ghostscript. One can install it the same way as the other packages I’ve mentioned.
sudo apt-get install ghostscript
Once that step is completed, one can use the “convert” command to create individual files. I recommend using PNG instead of tiff here, because I found that the best results came from the PNG files using this method.
convert –density 400 pdf.pdf –colorspace gray –resize 3000x output_%03d.png
Here is a breakdown of the individual parts of the command. ‘Density’ refers to the DPI (dots per inch); 300 may also be sufficient. The ‘pdf.pdf’ is a placeholder for the name of the PDF file. The ‘colorspace’ designates that the conversion should be done in grayscale. The ‘resize’ option sets the pixel width of the new images.
The last component specifies that the program should generate an individual output file for each PNG file. The ‘%03d’ specifies that it should include a three-digit number for each page. In other words, the first page will be labeled ‘001,’ the second ‘002,’ etc. If one wanted to use more than three digits (say, four), one could change it to ‘%04d.’
Depending on the size of the PDF, this step can take quite a while and it will use a lot of the computer’s memory. Especially if you are using an older machine, it is inadvisable to attempt to multitask on the same computer while doing this step.
If the scans are two-page spreads, I recommend doubling the resize total and then using ImageMagick to split them into individual pages, as detailed above.
Step Three: Running OCR Software
One should start with the separated image files of the book that is to be OCRed. In the Terminal, navigate to the files’ location.
Tesseract
Running Tesseract is somewhat simpler than using OCRopus. Once the proper directory is open via the CLI, one can run Tesseract on a single file with the following:
tesseract [File_Name] [Output_File_Name]
In this command, “tesseract” activates the software. “File_name” should be exactly as the name of the image looks, and then one should choose the name of an output file for saving the results of the OCR. This output file will be a .txt file. If one is not required to maintain the formatting of the original book, this method is probably adequate.
In order to run an entire batch process of many files, type the following:
for i in *.tif; do tesseract $i [insert_output_folder_name_here]/$i; done
This command generates a .txt file for each image and places it into a new output folder with the same name as the image. Going through a large number of .txt files could become tedious; one can also use the command line to create one “master” document:
for i in *.txt; do cat $i; done > complete_book.txt
This command stipulates that, for every .txt file in the folder, Tesseract should concatenate that file in to a single text file (here called “complete_book”, but the name could be anything).
Sometimes, though, the page layout is important. For those projects, a .txt file is not good enough because in .txt output layout, information is lost. Tesseract also offers the option of creating outputs in html. Embedded within the html are the page coordinates for each item it OCRs. To change Tesseract’s output so that it creates html files instead of .txt files, add “hocr” to the end of the command:
for i in *.tif; do tesseract $i [insert_output_folder_name_here]/$i hocr; done
This generates an html file for each individual file that it runs. It is then possible to extract the page coordinate data from those files and to display the text according to those coordinates.
OCRopus
In order to run OCRopus successfully, there are four steps that have to be completed: generate new images of the scans that are deskewed, split those page images into images of the individual lines, “read” those lines, and then create an output file of the results. One could do them all at once by writing and executing a shell script, but it is actually advisable to run them individually, since each operation offers an occasion at which doing a little manual cleanup may substantially improve the final output. There are a few notations below about each step. The sample commands include those that have transpired to be some of the most important settings. For more information, type ocropus-[command name] --help and see a complete list of options in the command line. (In the sample, “book” represents a new directory that will be created for the new files by running the first command.)
OCRopus Step 1: create OCR “scans” of the pages
ocropus-nlbin -n -o book -t .5 *.tif
This command tells OCRopus to create its own black and white scans of the pages for everything in the file that is a .tif. (If using another file type, simply change *.tif to whatever file type necessary, such as *.png for PNG files.) If the pages are cropped or otherwise smaller than normal, add the -n argument (as pictured above) to the command to disable error checks. Otherwise, the software may stumble over the page and not do anything to it. The -o designates the output folder. The -t .5 here represents the darkness/lightness level of the scan (“t” meaning “threshold”). The value “.5” is probably the best setting to use at the start. If the OCR results are unsatisfactory and the original scan is slightly too light, try increasing this number. If it is too dark, decrease the number. Typically, the best results lie somewhere between .4-.7. Anything much lighter or darker than that tends to be illegible – both for a human and a machine. Sometimes it is beneficial to take a few pages and experiment with running through all the steps with different settings before committing to running the entire book.
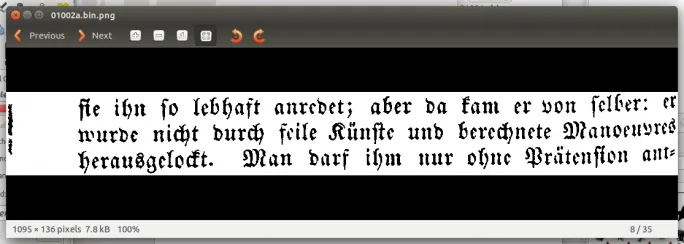
OCRopus Step 2: split pages into individual lines
ocropus-gpageseg –n [--minscale 10] book/*.bin.png
Here the software identifies the individual lines of the pages and creates individual files of the segmented lines in new folders, one for each page. The –n argument disables error checking, meaning it will output a line for every element on the page, even if it thinks it is an error. One does not have to use this argument, but if some of the lines are incorrectly cut (i.e. two lines of text read as one), one may inadvertently lose some lines.
Some lower quality images may not meet the basic minimum page scale of 12 which is required for the software to work. The argument in brackets (which would not need brackets if actually running it) tells the script to lower the minimum page scale.
At the end of the second step one has a folder for every page, each containing all the images of the segmented lines. It is sometimes useful to stop here and go through the page file folders that are created and clean out any obvious “junk” so that it does not show up later in the output. For example, the appearance of images that are not lines of texts (areas of white space or random dark marks, for example) could be from strange artifacts on the page, from borders, or images included on a page. With the Fraktur, it is also advisable to eliminate page numbers. Usually, these numbers are not in the Fraktur script, and as such, they are not read properly (if they are picked up at all, which is not always the case). One might prefer to leave them in to make checking passages easier if the font is not a problem.
If, while running the pages, an error message appears that claims the pages are too small, there is a way to fix it. OCRopus expects pages that are at least 600x600 pixels (what it considers to be a book page). If the pages are smaller than this, one can use ImageMagick to add some white space that will prevent the error (the –n argument will not prevent this error, and when it occurs, the command will not create any output for the pages – a potentially big problem). To change the pixel count in ImageMagick, enter the following command on the command line while in the folder where the images are located:
convert [file_name] –extent 600x600 [or pixel size of choice] [output_file_name]
For example: convert page001.tif –extent 600x600 page001_fixed.tif
OCRopus Step 3: generate the OCR results
ocropus-rpred -Q 2 -n -m fraktur.pyrnn book/*/*.bin.png
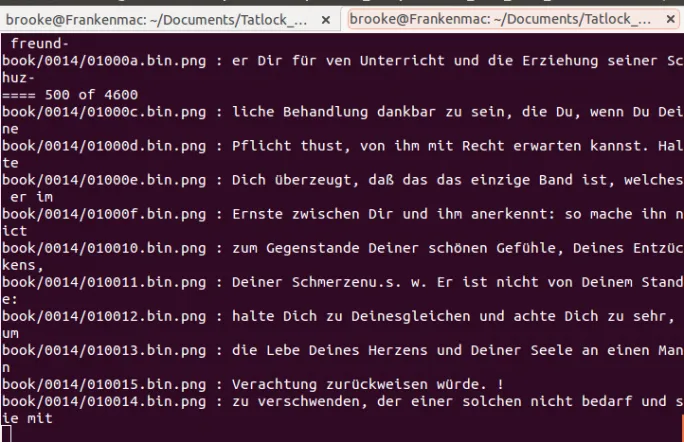
This step is the point where the text is actually “read.” The software will generate a .txt file for every line of the segmented text in each of the page folders. The –Q with a value of 2 designates that the job should be run in parallel on two cores (if the computer has a four-core processor, for example, one could change this to 4). The –m option here designates that it is using the line recognition model for Fraktur. If using a different language package, replace ‘fraktur.pyrnn’ with the name of the other language training data package. Without “-m fraktur.pyrnn” the task will run in English by default. I also recommend including the –n argument here because if the software hits an error message, it will not generate a .txt file for the file AT ALL, and there is a chance of losing something entirely that may not be an actual error.
A step that has been recently added to the workflow is to go back and check for any strange lines that have either a lot of whitespace where the line was cut incorrectly or where multiple lines are cut into one line. These lines will not register properly in the OCR, and entire lines (or more than one line) can be lost at once. I went back and typed in some transcriptions by hand. This may not be necessary, depending on the overall goal of the project, but it is good to be aware that it can happen nonetheless.
OCRopus Step 4: generate the html file
ocropus-hocr book/????.bin.png
This step generates an html file that can now be checked for errors, and eventually used for text mining and other such tasks.
Step Four: Cleaning up OCR Files / The Unsolved Problems
Some cleaning up is usually necessary before the results can be used.
First of all, any words that were hyphenated on the book pages will need to be put back together. There are ways to automate this with find and replace and regular expressions. Regular expressions are, among other things, a powerful search tool. Many programs for editing plain text (Geany, for example) allow you to search using these expressions via the “find” or “find and replace” tools. One way to use them to find and eliminate all the hyphens and put the hyphenated words back together is described below:
Find: ([a-z])- \n([^ ]*)
Replace with: \1\2\n
The above searches for lines that end in letters with a hyphen and then reconnects the first word in the next line to the part of the word that precedes the hyphen. For a full tutorial of regular expressions refer to the Programming Historian. Of course, if there is a word that actually needs to be hyphenated at the end of a line, it will also be changed, but the occurrences of that are usually fewer than the appearances of hyphenated words.
If there are lines in the output that are nothing but gibberish, something like “z hgrr ==== seslefs ef z,” then that probably means the lines from the scan were segmented incorrectly and two lines have been combined into one image file, or there was a great deal of white space attached to a line that made it unreadable. In this case it is necessary to go back and check it manually. Doing so before creating the output means the problem is already taken care of when it is easier to identify. It is not clear why these lines are split improperly (though they seem to happen more, but not exclusively, at the tops and bottoms of pages). At the moment, it is one of the process’s many imperfections that does not appear to have an easy fix.
The punctuation can also be quite a mess. Quotation marks are often mistaken for commas and apostrophes. This is not extremely problematic for the kinds of text mining that strip out punctuation anyway. But one can use the find and replace function to eliminate unnecessary or confusing punctuation if concerned about text file readability.
We have found that using the spellchecking software Enchant can be useful for making strategic corrections to the texts. Enchant can generate a list of words that appear in the text that do not have matches in its dictionary and then return them in order of their frequency of occurrence within the document. This is achieved by using a regular expression on the command line:
grep –oh ‘[A-Za-z]\+’ ‘$@’ | sort | uniq –c | sort –nr | grep –o ‘[A-Za-z]\+’ | enchant –l –d de_DE | less > output.txt
The “grep” command, at its most basic level, searches for patterns in files and then returns the results. This set of commands pulls all the words from a a text file, sorts them and eliminates all the duplicates, then checks the words against the dictionary and returns everything that is in the text file but not in the dictionary in order of most to least frequent. The “de_DE” file is the German dictionary. The standard English dictionary would be en_EN. The final part of the command writes the output of the command to a text file.
This list can then be used to prioritize certain kinds of corrections and target them globally in the document, hopefully speeding up the process and making it somewhat more accurate. One can do quite a bit to improve the OCR'd texts without expending a great deal of time and effort.
Conclusion
At this point, the OCR results are ready to be used for text-mining purposes. If some basic data about the corpus is of interest (word frequencies, lengths of texts, most common words, etc.), something like the Voyant project might be of interest because one can quickly upload a group of texts and receive this kind of information in its multi-tool interface. If comparing multiple differing versions of the same document, Juxta offers a way to collate and compare documents to one another. There are many projects that work with topic modeling as a method to investigate a corpus. TAPoR also has links to lots of different tools that may be worth investigating further.
I would also like to give credit where credit is due. I owe a great deal of thanks to the Humanities Digital Workshop and Doug Knox and Steve Pentecost, who helped me get started working with this software in the first place, and have always been helpful when things have gone awry. I also want to thank Julia Wu, who was my colleague in the summer of 2013 and who helped me work through many other complicated and unsuccessful workflows before we decided on the process described here. Thanks are also due to Kenny Gradert, who figured out the regular expressions, and to Jackie Nelligan, who found the PC-compatible bulk renaming software.
I am also grateful to Joe Loewenstein, Claire Ross, and Doug Knox, for reading and offering thoughtful feedback on multiple drafts of this project.
Brooke Shafar
Washington University in St. Louis